| Home Windows 8 FailSeaMonkeyTripod MountNVidia *Rant*RoR ScreenshotsThe HDBGLeakage!!!Gain ControlClock CollectionLittering & YouClean-outClock "Repair"CHIPS 65550The LabOptical DriveCoffeecup | You are here: Firealarms> Articles> 420CDT Driver Install without a floppy drive > |
|
The machine in question here is the one above, a Toshiba Satellite Pro 420CDT running Windows 3.11 for Workgroups. It will work on a 430CDT as well (as they are the same except for processor speed and default memory), and might work on others. WARNING:
Taking this advice and applying it to a machine that is not related to the machine tested here (420CDT), however, shall be done AT YOUR OWN RISK. I am NOT RESPONSIBLE for any OS crashes, driver failures, potential requirement for an OS re-install due to an inappropriate video driver, or other damage. No matter how much you may beg, or plead, or cry, I will not help you if you messed up a machine that was NOT a 420CS/CDT or a 430CS/CDT. Thankfully, Toshiba has an archive of drivers for their older machines, including the 420CDT. Unfortunately, most (if not all) require that you use a floppy disk. HOWEVER, it is possible to cheat (!!!) your way around this requirement, as long as you have the following:
Note that while you do not strictly need to use serial for this project, I did since the CD-ROM drive in my 420CDT doesn't work, and, while opinions may differ quite a bit, it is also far more convenient than using a recordable CD.
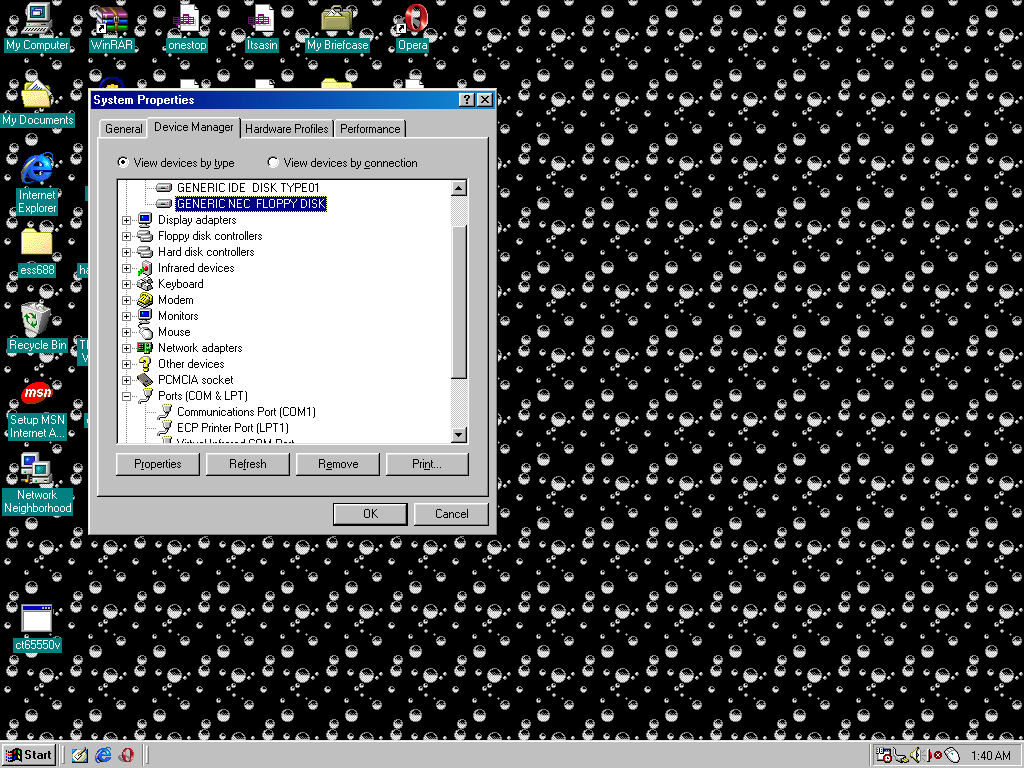
First, download the driver from Toshiba's website, either on the machine chosen to meet the above criteria or some other machine. Save it somewhere you can find it, and transfer it to the other PC if necessary. Next, insert your floppy diskette. Make sure no important data is on it, and that it has no bad sectors. The latter step is VERY IMPORTANT, because the program you just downloaded requires it, and it would do you no good to find out that it placed a file onto a bad spot on the disk.
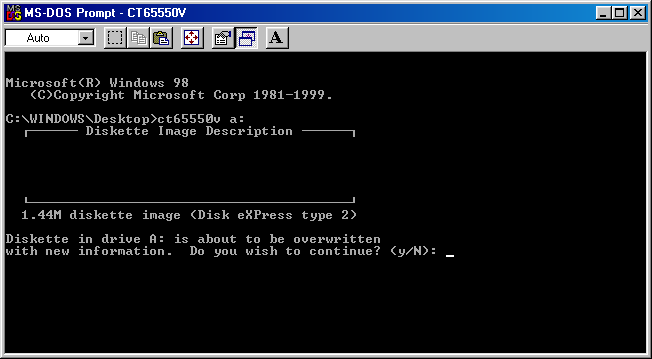
Once you have verified that the diskette is blank and has no bad sectors, open up a command prompt. Since the program you are about to run requires what is called "real-mode DOS", it might not work on Windows NT versions, or XP and later. Once you have found the file, type <nameoffile> <driveletter>, where "nameoffile" is whatever the executable's name is, minus the .exe (in my case it was ct65550v), and "driveletter" is the letter that shows up beside the floppy drive (A: in most cases).
Once this process has completed, it is time to transfer the files over to the Satellite. Note that you will also have to transfer the files off the Windows 3.1 setup disks as well, but in my case they were already there since I kept them after installing 3.1. This is where things may differ. You may have chosen to use a CD, and in that case you can simply burn all the files to a CD and transfer them that way. If you chose my method of using a serial cable, read the next steps. The following instructions assume that the 420/430CDT is running Windows 3.1[1].
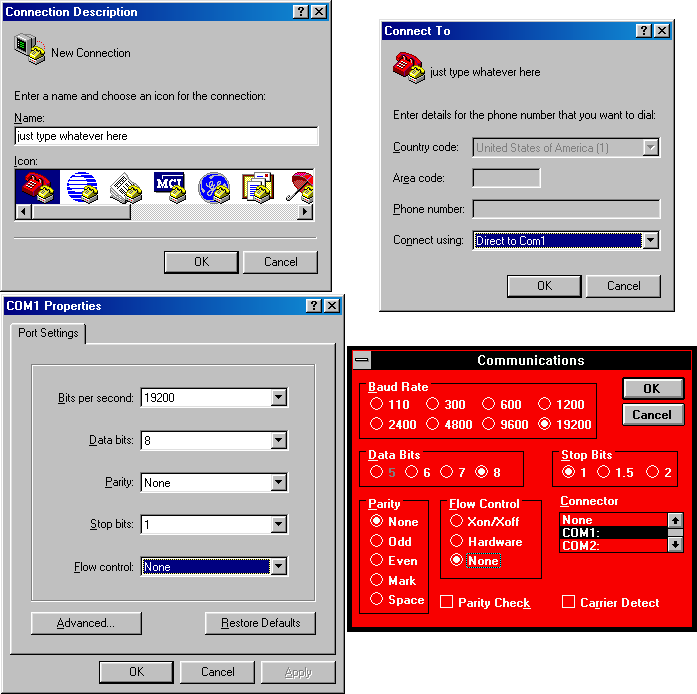
Open up the terminal emulator program (called "Hyperterminal" on Windows 95 and later, "Terminal" in Windows 3.1) on both systems. Set your connections to COM1 (or whatever serial port you are using; this might take some experimentation). Change your connection speeds to 19200 bits per second (max supported by Windows 3.1, and also a safe speed).
When transferring files, on the machine with the file, select "Send File", select which file you want to send (one at a time!), and make sure you are using the Xmodem protocol, otherwise it will fail. You can use "Kermit" as well, but I haven't tried it, so again doing that is at your own risk.
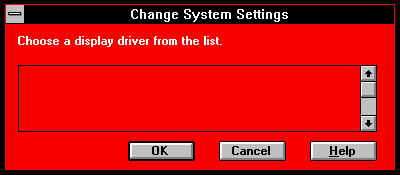
Now sit back and enjoy yourself for a while, continuing to feed it files when it finishes, until you have sent all the files. It could take an entire day, I don't know. It took me about two and a half hours with a good quality cable. Once you have transferred all the files over, you need to do one more step (this one took some figuring out). If you try and go into Windows setup and change the driver now, you will find a blank window:
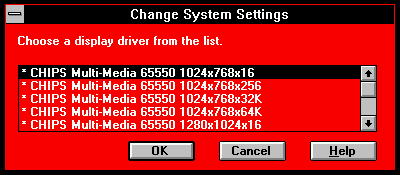
To change this, simply delete the OEMSETUP.INF file, and rename OEM550.INF to OEMSETUP.INF. It may cause the driver selection window to disappear the first time, but it will now display all the options:
Select the 800*600*64k option. This is the maximum supported natively on the 420CDT and possibly the 430CDT. I tried using the 1024*768 option, and it looked weird because the display wasn't scaling down. And that is all! |
|
| Page created on July 20, 2014 at 1:11 AM EDT. Last modified on July 20, 2014 at 3:33 AM EDT. |
